STEP 3:
setting up the lens #1
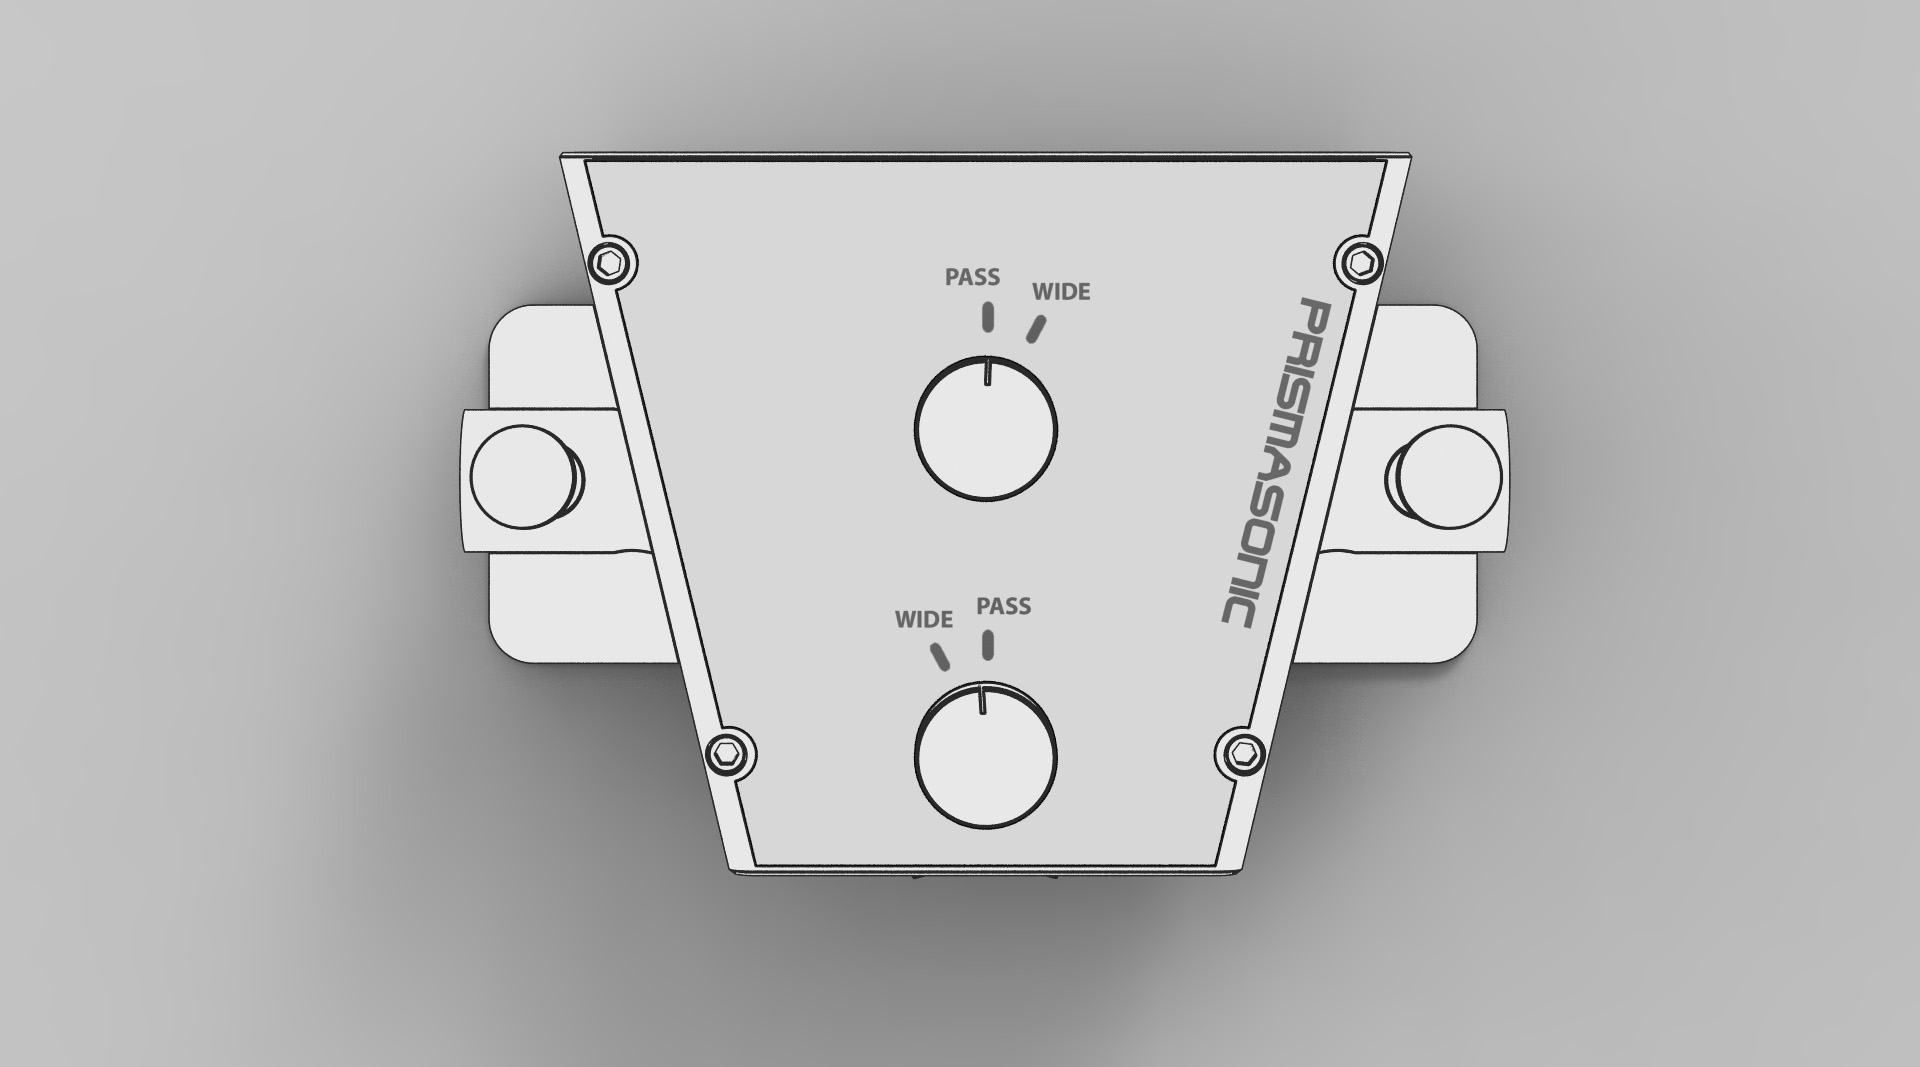
First move the both prisms to the ‘PASS’ mode using the control knobs until the prisms stop.
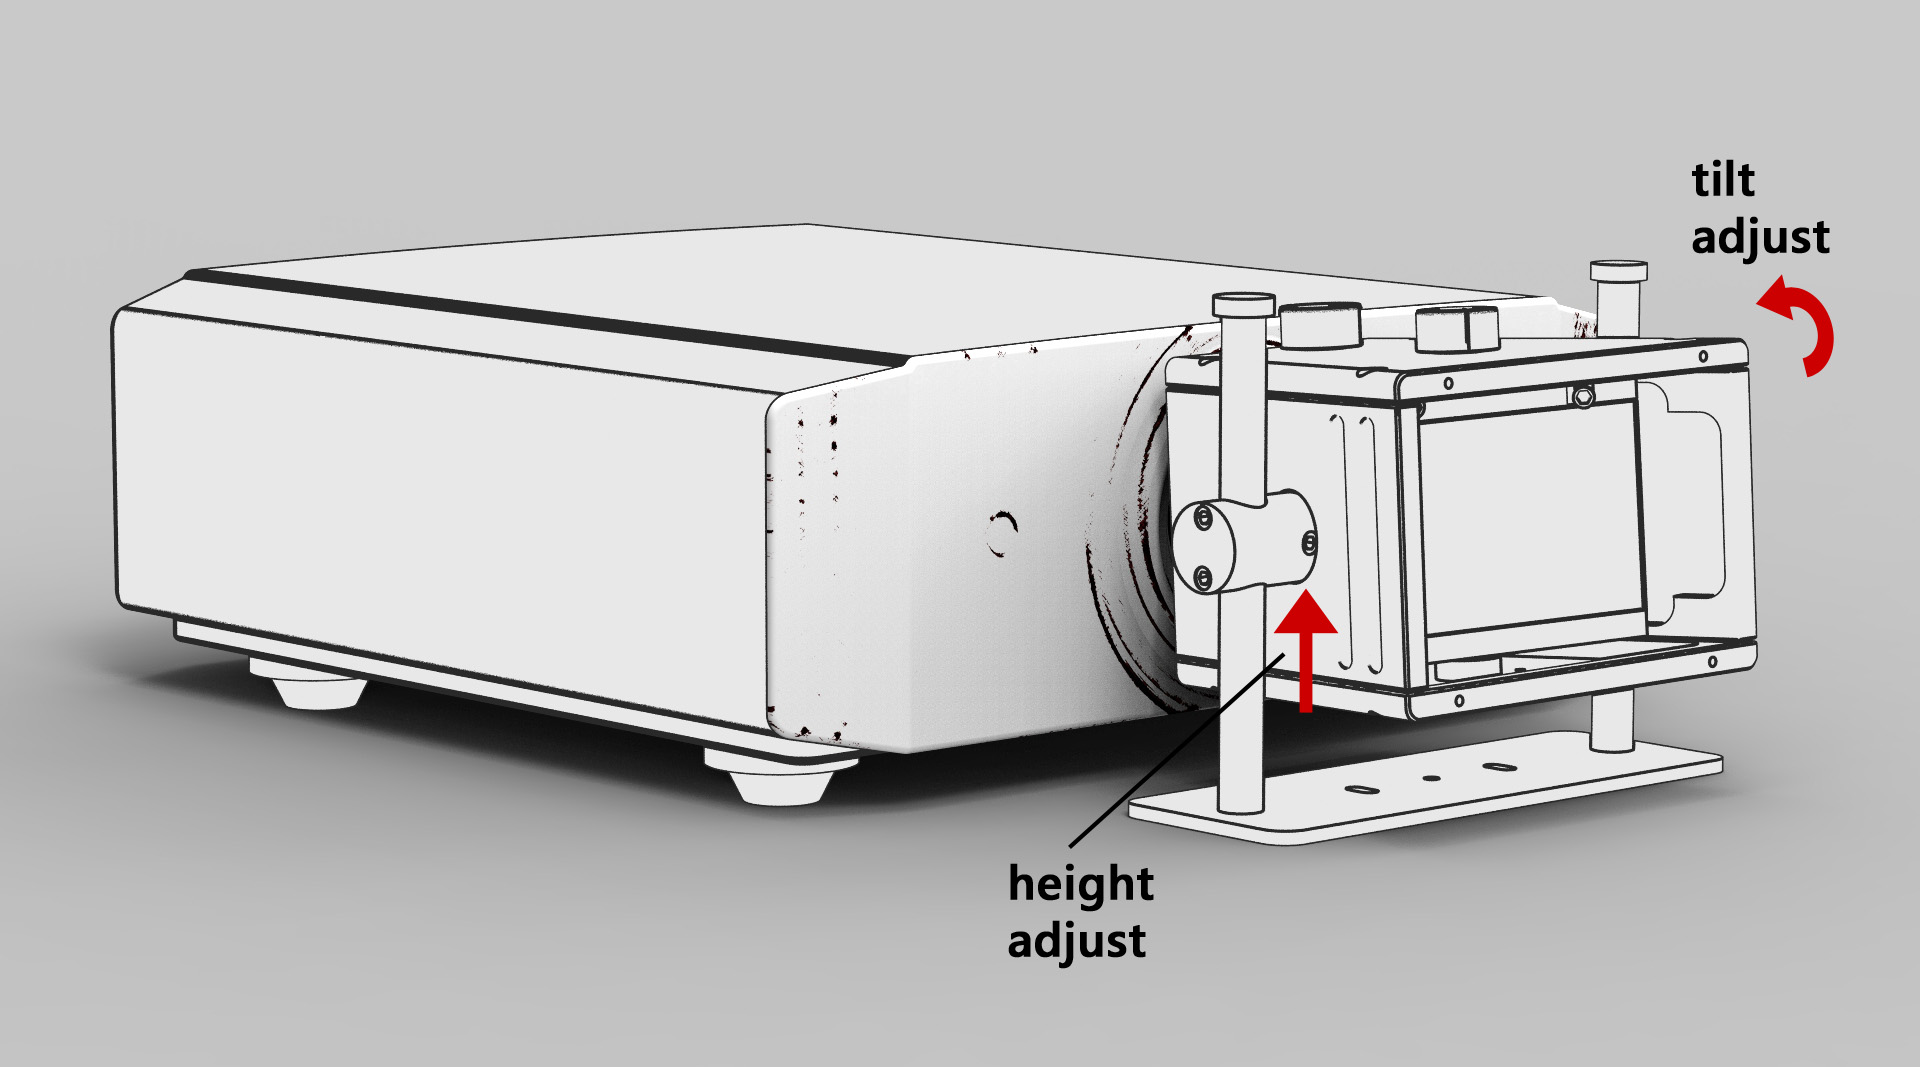
Carefully position the lens with a stand in front of the projector, with the small opening closest to the projector lens and the large opening pointing towards the screen. Now manually adjust the lens in a stand. Make sure the entire beam fits centered within the two lenses. Lower or raise, and tilt the lens until the desired height and angle is reached. It is helpful to have a picture that fills the entire panel of 16:9 projector.
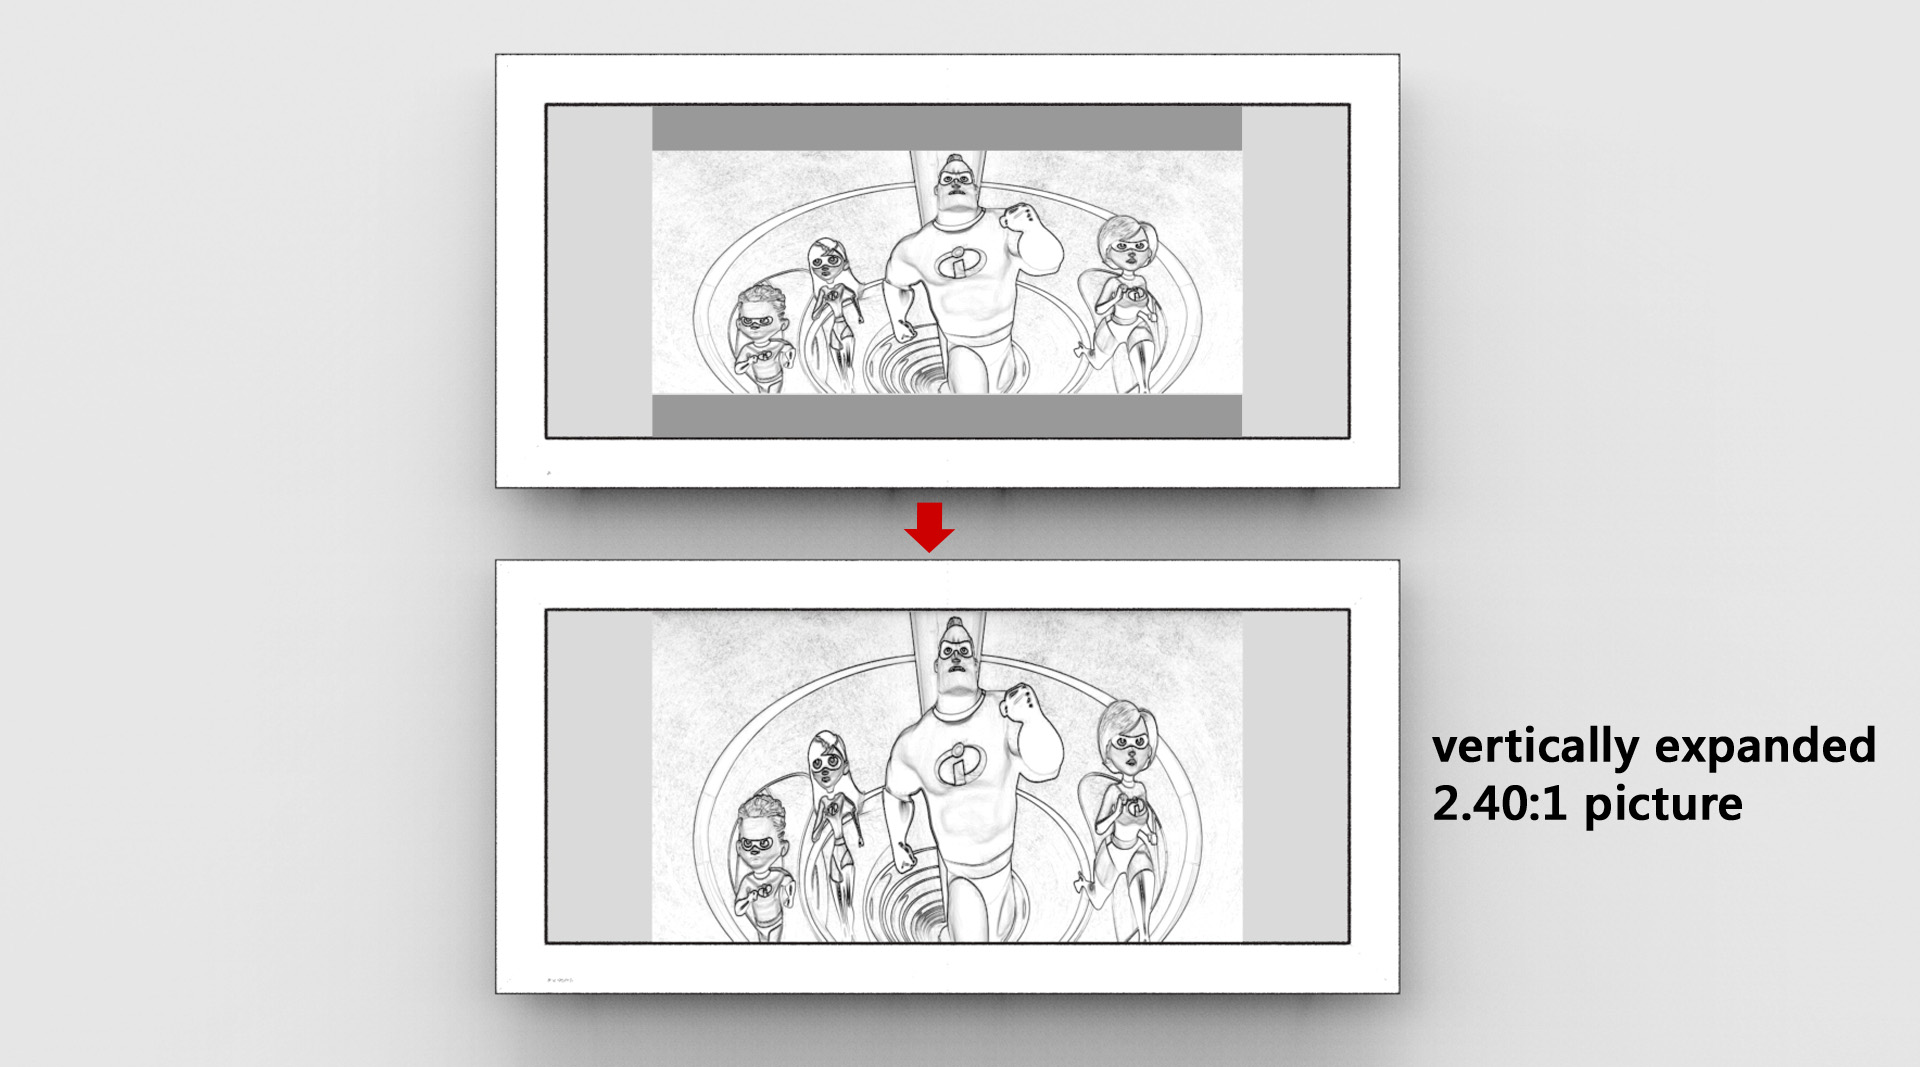
With a 2.40:1 source material the vertical expansion is good to be performed to the picture at this step. This electrical processing is usually done by the picture settings of the projector or the media player. Make sure the image is now rectangular and still symmetrically in the center of the screen. The vertical keystone correction of the projector may have to be used to obtain the corners perfectly rectangular.