STEP 2:
setting up the lens #1
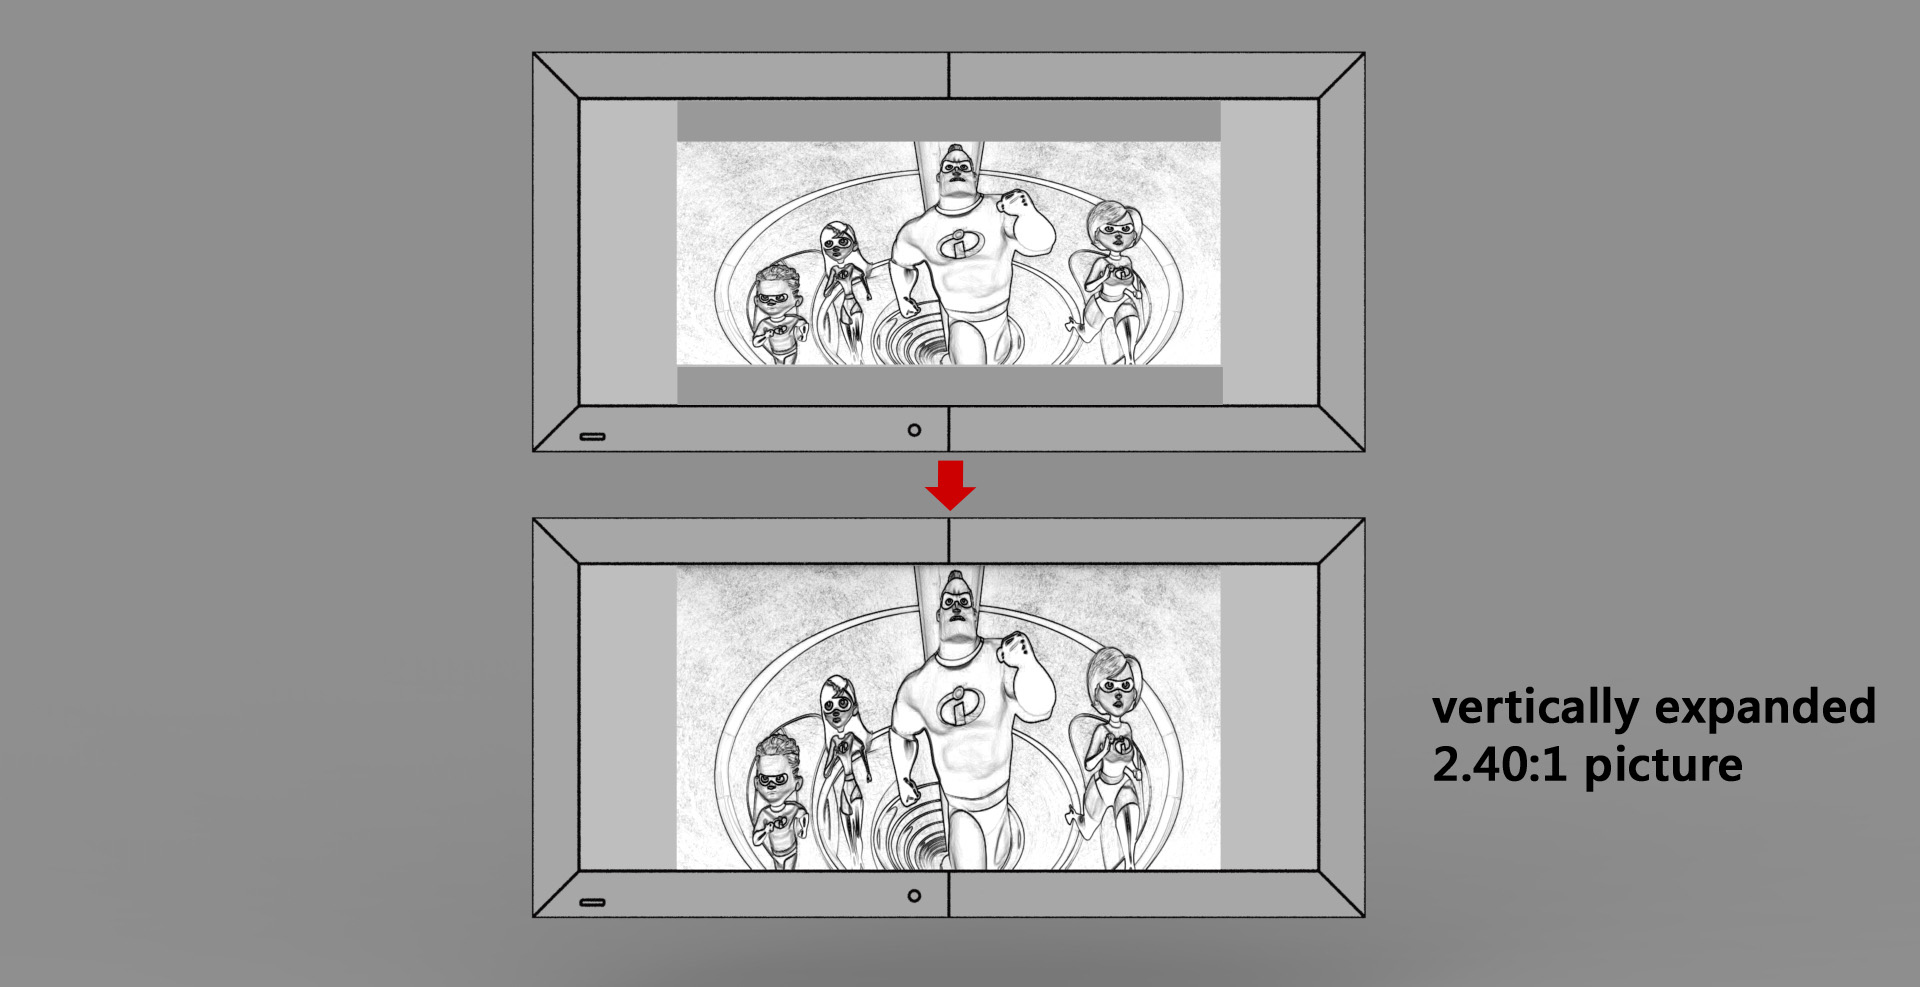
Turn the projector ON and position the 16:9 picture exactly to the center of the screen. It is helpful to have a picture that fills the entire panel of 16:9 projector. With a 2.40:1 source material the vertical expansion is good to be performed to the picture at this step. This electrical processing is usually done by the picture settings of the projector or the media player.
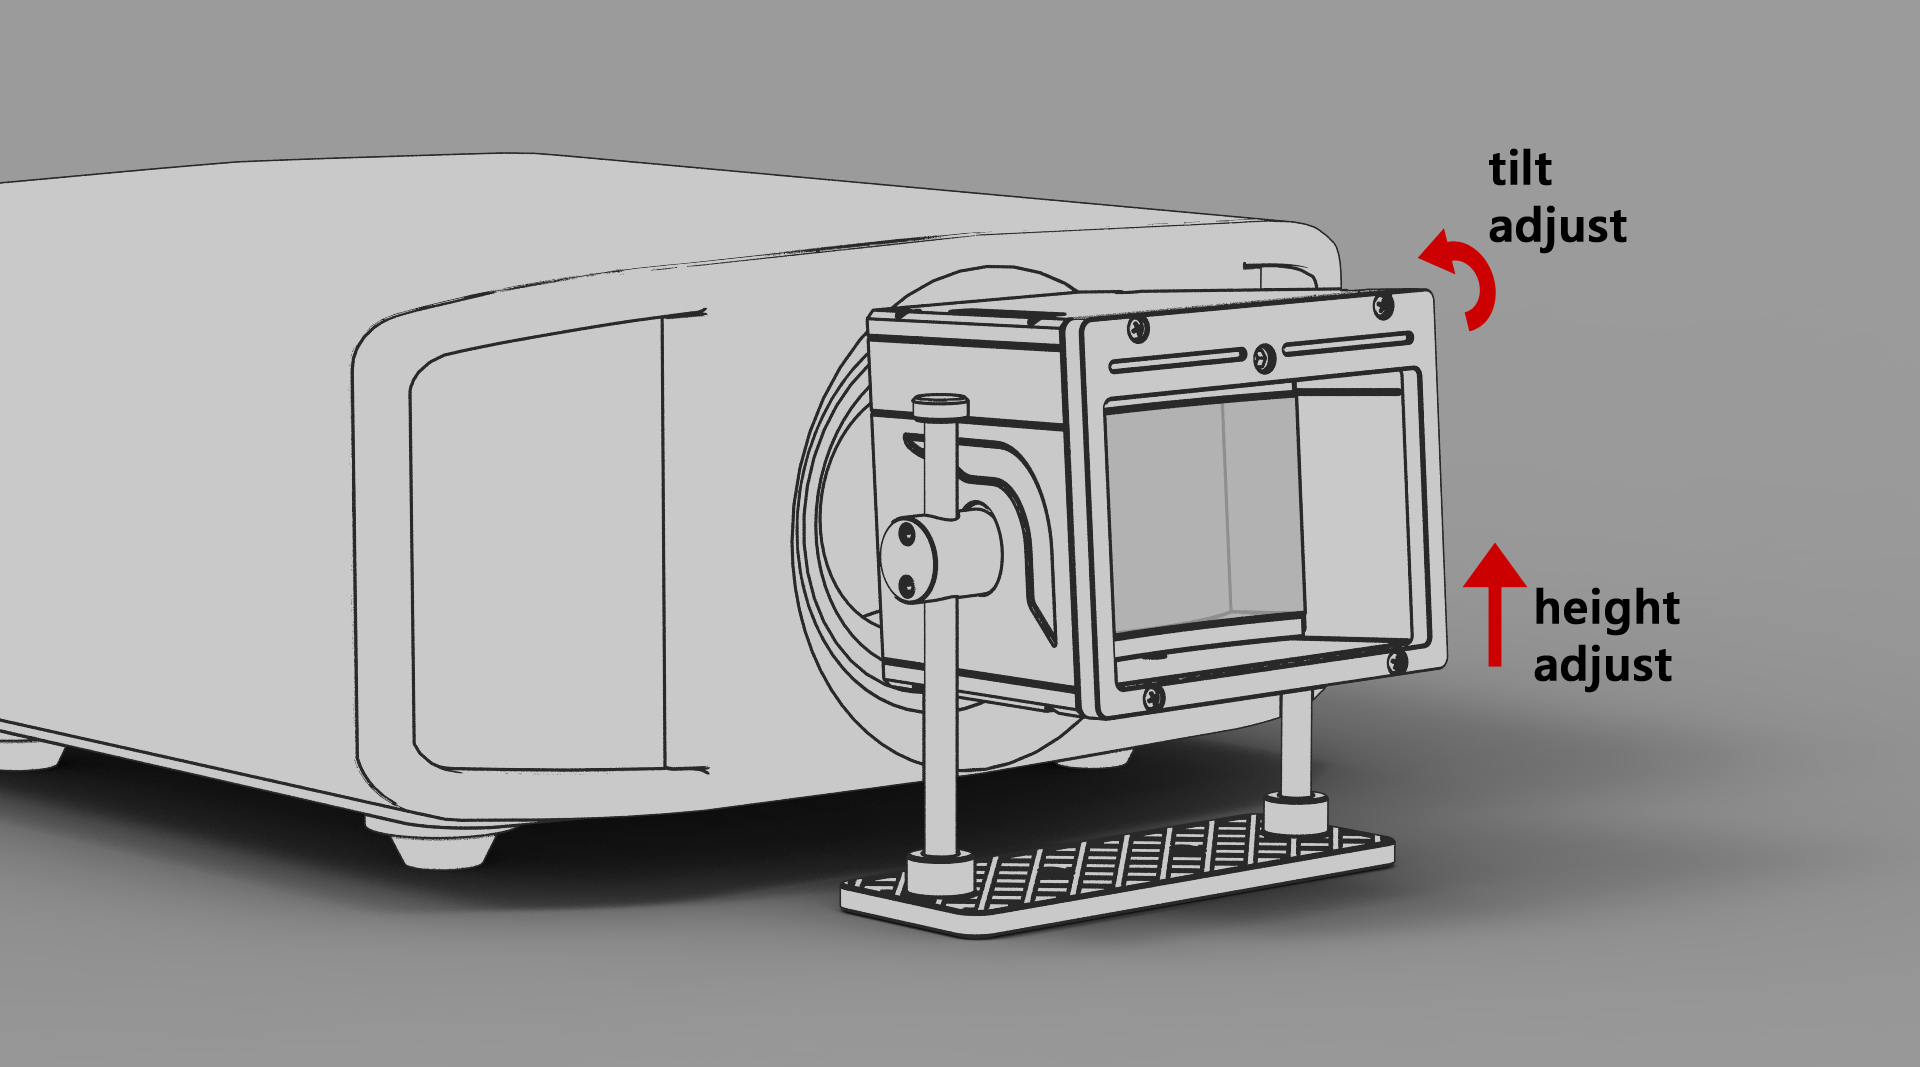
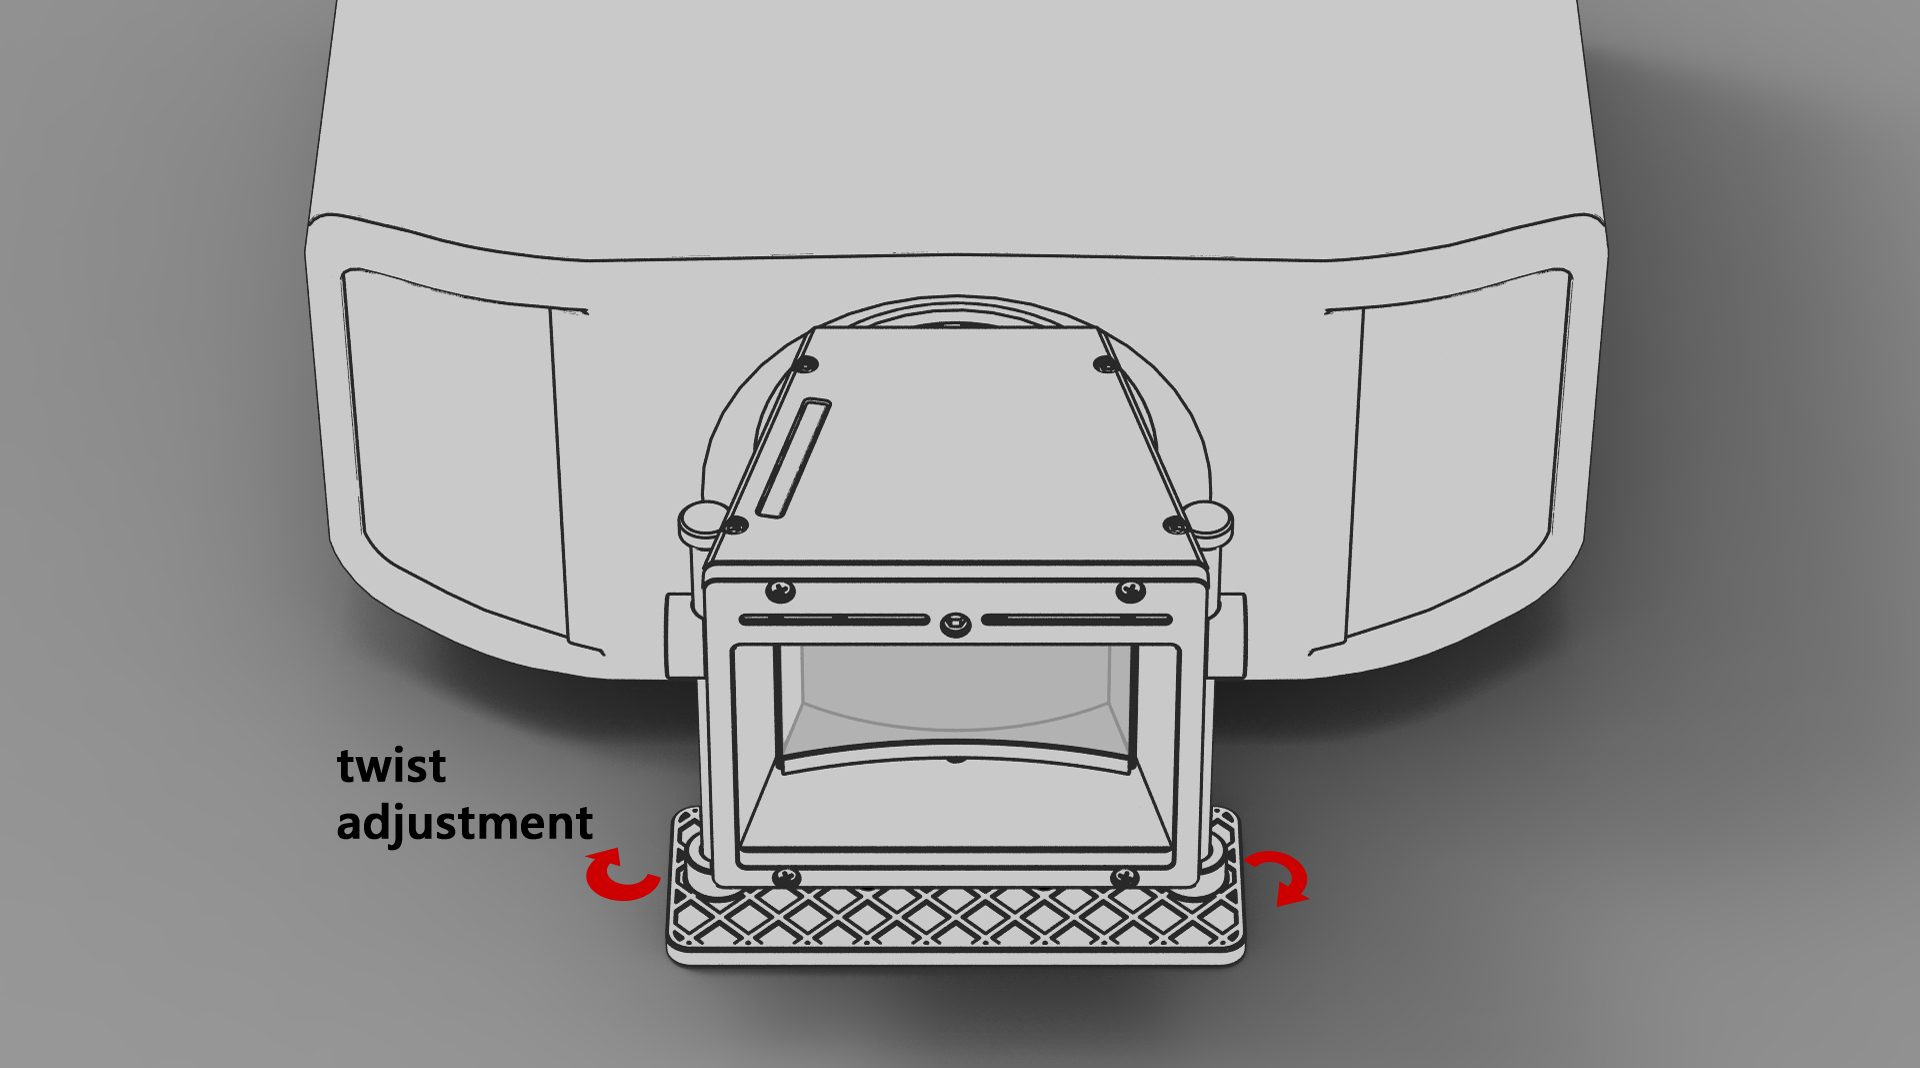
Carefully position the lens with a stand in front of the projector, with the small opening closest to the projector lens and the large opening pointing towards the screen. Now manually adjust the lens in a stand. Make sure the entire beam fits centered within the two lenses. Lower or raise, tilt and twist the lens until the desired height and angle is reached. Tilting the lens helps to even the pincushion distortion to both upper and lower legs of the picture, and twisting the lens shifts the picture placement horizontally. Make sure the image is now rectangular and symmetrically in the center of the screen. If the picture still is asymmetrical and/or trapezoidal, lower or raise the lens only from other side of stand to make it symmetrical. The symmetrical trapezoid shape can be corrected by the keystone setup of the projector.
Depending on the throw ratio of the system, the picture geometry has now some amount of pincushion distortion. The remaining distortion can be faded out by a slight picture over scan to the velvet frames, or by the use curved screen. Some projectors also have the electrical pincushion correction settings.