STEP 3:
setting up the lens #2
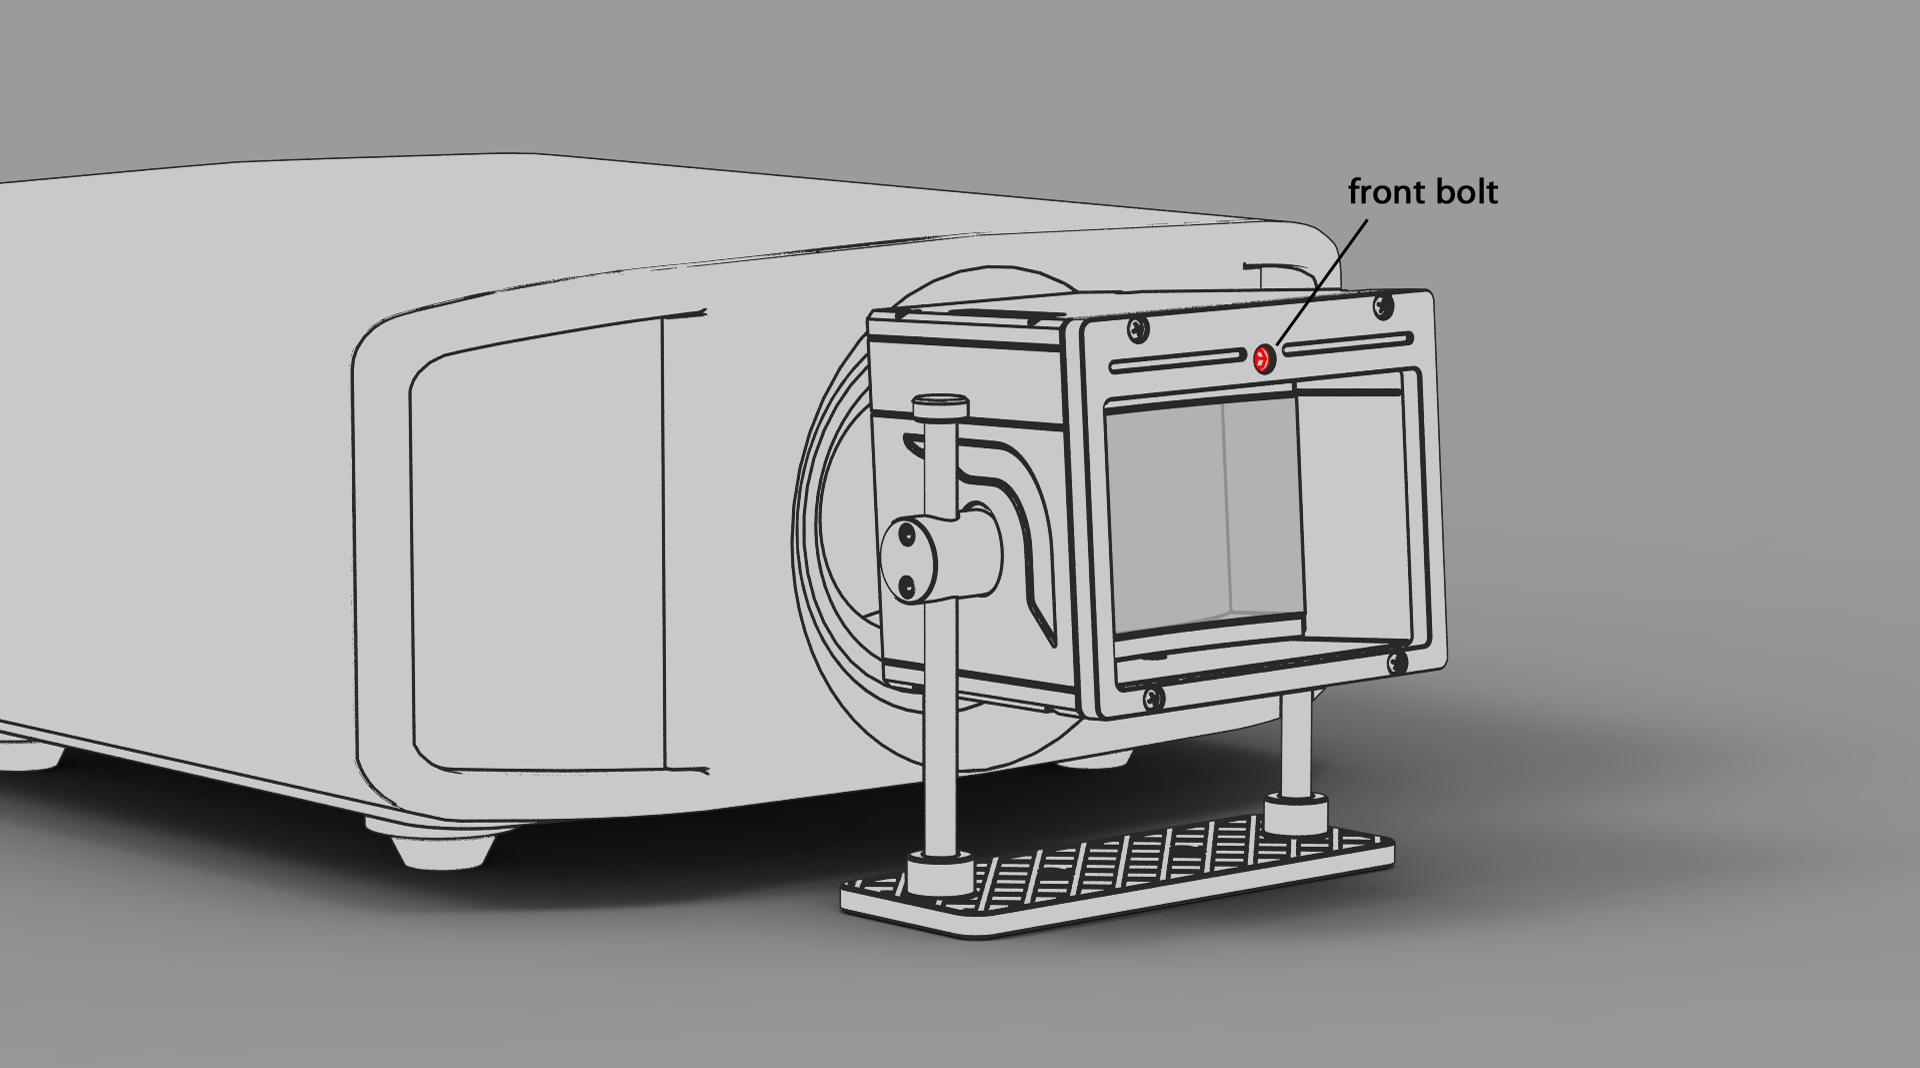
Now adjust the lens focus. Make sure the delivery lock bolts has been removed from the bottom plate. By using the L-wrench, turn the front cap bolt in either direction until the 2.40:1 picture gets focused. It is helpful to use a test grid to monitor when the horizontal and vertical lines in a picture become in focus simultaneously. It is normal that while adjusting the focus, also the picture width slightly changes.
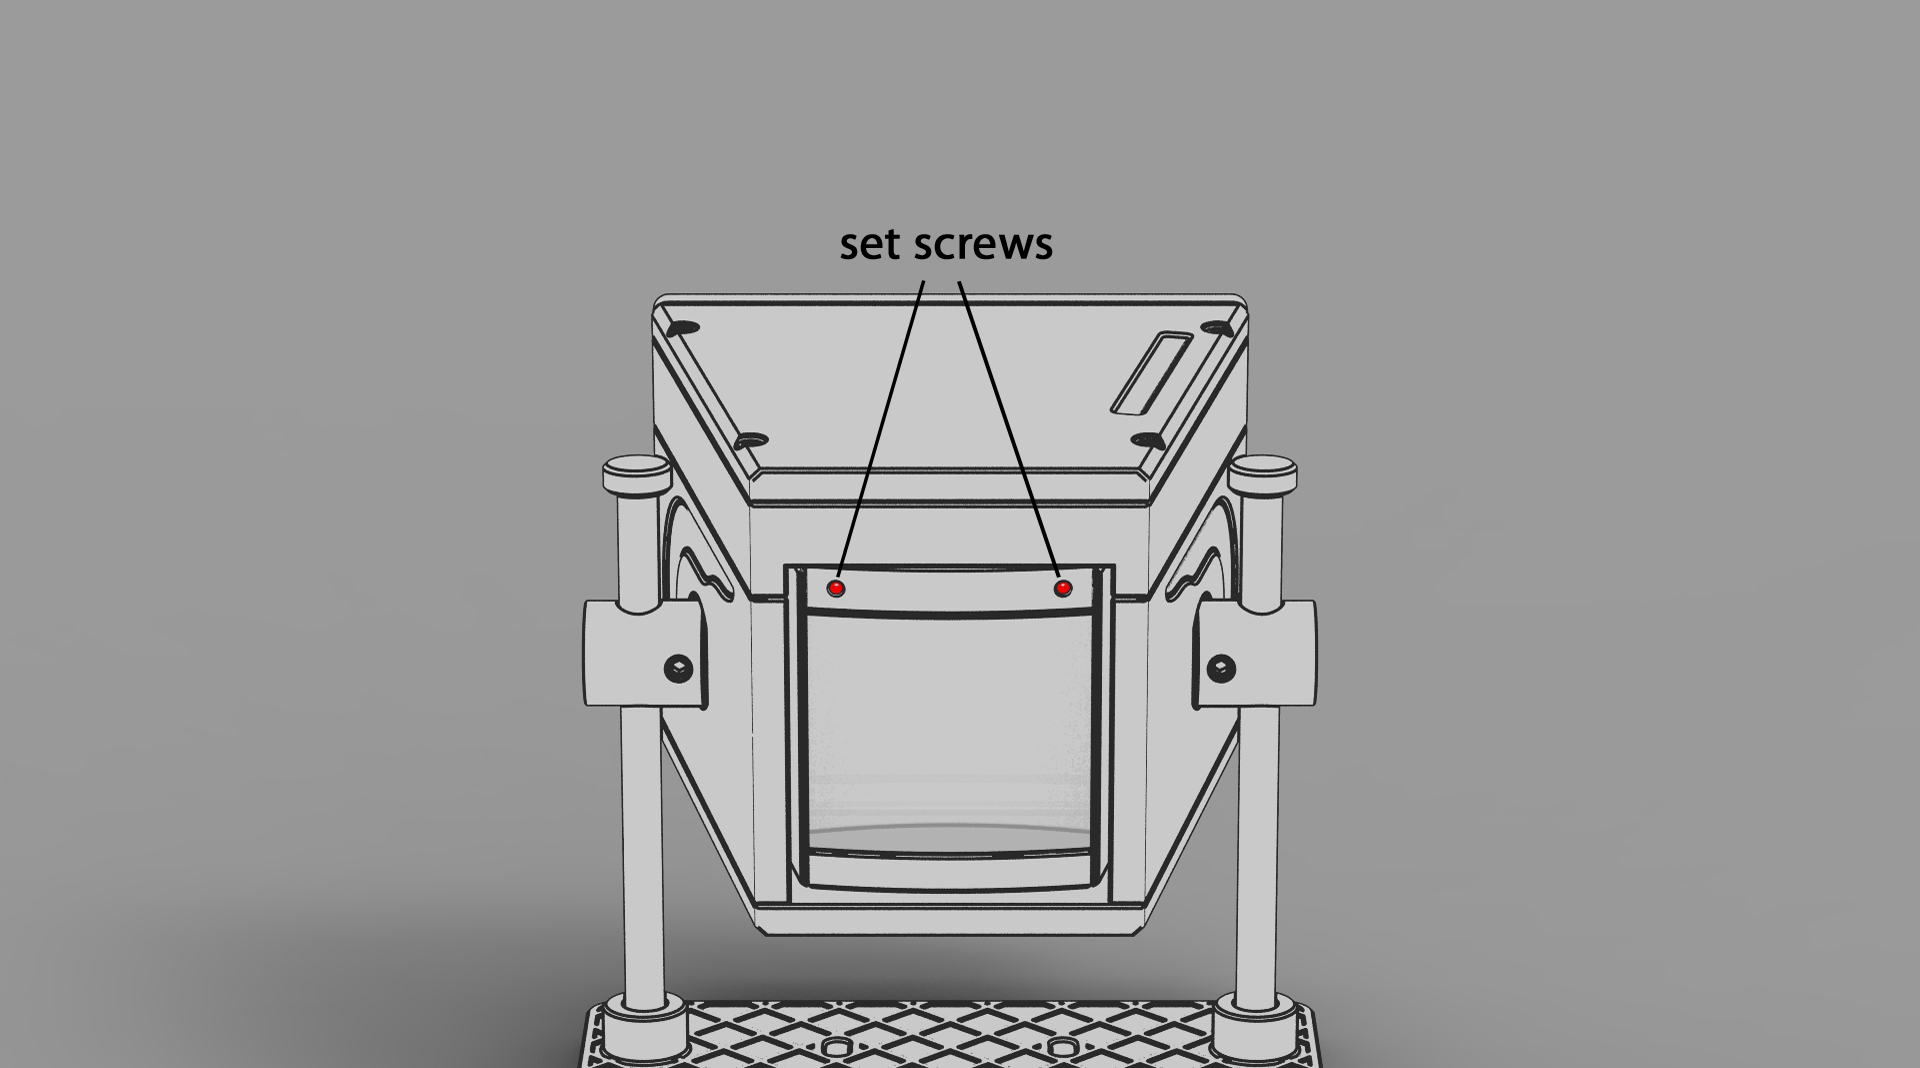
In case there exists an imbalance in focus between the left and right sides of the picture, it is possible to correct it by fine rotating the small lens. This is done with the L-wrench by opening the other set screw and closing the other for the same amount. Thus, it is possible to rotate the small lens in either direction, and to find the perfect balance between the sides. Good adjusting step for the screws of this iterative tuning process is a quarter round at the time, after which every time the picture is refocused by the lens. If the imbalance gets worse after first iteration round, this indicates that the small lens has to be rotated to another direction in order to find the calibration sweet spot.